If you have a bike, whether it’s a regular bike or an electric one, keeping your battery charged is really important for smooth rides. As a bike mechanic, I often get asked, “How do I charge my bike battery at home?” It’s not too hard to do, but there are some important steps to follow to make sure you’re doing it right.
Table of Contents
ToggleIn this blog, I’ll show you how to charge your bike battery safely at home, and give you some tips to make your battery last longer.
Why Is It Important to Charge Your Bike Battery the Right Way?
Charging your bike battery the right way is important because:
- It helps your battery last longer.
- Your bike works better when the battery is fully charged.
- It keeps your bike safe from problems like overheating.
Step 1: Know What Type of Battery You Have
Before charging, you need to know what kind of battery your bike uses. There are two main types:
- Lead-acid Batteries: These are common in regular bikes.
- Lithium-ion Batteries: These are usually in electric bikes (e-bikes).
Each type needs different charging methods, so let’s look at both.
Step 2: Choose the Right Charger
For lead-acid batteries, make sure you’re using the charger that’s made for this type of battery. For lithium-ion batteries, make sure your charger matches the voltage and current your battery needs. Using the wrong charger can ruin your battery.
At Bike Pro Mech, we can help you choose the right charger if you’re not sure which one to get.
Step 3: Get Your Battery Ready
- Turn off your bike: Always turn off your bike before charging it.
- Disconnect the battery: For safety, especially with lead-acid batteries, disconnect the battery from the bike.
- Clean the terminals: Make sure the battery terminals (where the charger connects) are clean. Use a soft cloth or brush to clean off any dirt or rust.
Step 4: Connect the Charger
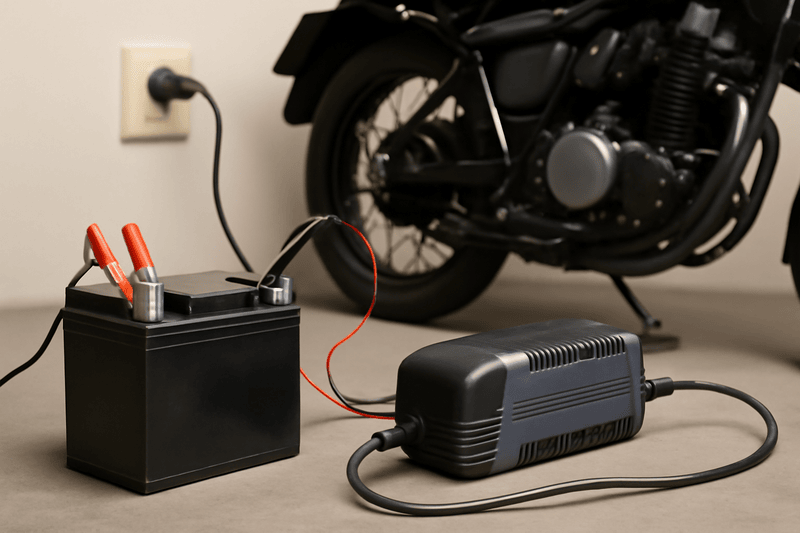
- Plug in the charger: Connect the charger to the battery. Make sure you connect the red (positive) lead to the red (positive) terminal and the black (negative) lead to the black (negative) terminal.
- Start charging: Plug the charger into a power source and switch it on. Always charge your battery in a well-ventilated place and away from anything that could catch fire.
Step 5: Watch the Charging Process
- How long does it take? Charging times depend on the battery and charger. Lead-acid batteries usually take around 4-6 hours, while lithium-ion batteries may charge faster.
- Don’t overcharge: When your battery is full, unplug the charger. Overcharging can damage the battery and make it last less time.
Step 6: Reinstall the Battery
Once your battery is charged, put it back into your bike:
- Reattach the battery: Carefully put the battery back in its place and connect the terminals.
- Turn on the bike: Check that everything is working properly by turning your bike on.
Pro Tips for Charging Your Bike Battery
- Avoid extreme temperatures: Don’t charge your battery in very hot or very cold conditions. Aim for a temperature of 10-30°C (50-86°F).
- Don’t let your battery die completely: It’s better to charge your battery before it’s totally empty. Letting it drain too much can shorten its life.
- Use a smart charger: If you’re using a lead-acid battery, a smart charger is a good idea. It will turn off automatically when the battery is full, so you don’t have to worry about overcharging.
When to Ask for Professional Help
If you notice any of these problems, it’s time to get professional help:
- The battery doesn’t hold a charge: If your battery isn’t lasting as long as it used to, it might need to be replaced.
- The battery gets too hot: If your battery is overheating while charging, stop charging and contact a mechanic.
- The battery is damaged: If you see cracks or leaks, don’t charge the battery—get a replacement.
Why Choose Bike Pro Mech for Your Bike Battery Needs?
At Bike Pro Mech, we understand how important it is to take care of your bike’s battery. Whether you need help with charging, advice on which charger to use, or battery repairs, we’re here for you.
Check out our other blog posts for more bike care tips, or contact us if you need any help with your bike.


